
Stable diffusion is perhaps the most popular deep learning model in use today.
Stable diffusion is a powerful variant of a class of models called diffusion models which make use of a special process for generating images from random noise.
Stable diffusion specifically implements conditional diffusion or guided diffusion, which means you can control the output of the model with text descriptions of the image you want to render. Stable diffusion is completely open-source and now, thanks to Bumblebee, you can use it in Elixir.
Installing and Using Bumblebee
In one of my previous blog posts, I introduced the Bumblebee library and showed some examples of the power of using Bumblebee for your machine learning applications.
At a high level, Bumblebee allows you to import models directly from remote repositories like the HuggingFace Hub. Bumblebee is capable of converting pre-trained models directly from PyTorch into Axon.
If there's a model you want to use that's available in PyTorch, you just need to find or implement an equivalent model in Axon and Bumblebee and import the model's parameters. Bumblebee opens up a wide range of possible applications for the Elixir machine learning ecosystem.
You can install Bumblebee from hex:
{:bumblebee, "~> 0.1.0"}
With Bumblebee installed, you can make use of its high-level APIs. Typically, you'll use Bumblebee to load models or tokenizers using Bumblebee.load_model/2 and Bumblebee.load_tokenizer/2:
{:ok, bert_spec} = Bumblebee.load_model({:hf, "bert-base-cased"})
{:ok, bert_tokenizer} = Bumblebee.load_tokenizer({:hf, "bert-base-cased"})
Loading Diffusion Models with Bumblebee
To make use of stable diffusion in Elixir, you'll need to start by loading a few different models, tokenizers, and featurizers. Stable diffusion is actually a pipeline that makes use of four different models for different steps in the image generation process. Specifically, you need to load:
- A CLIP Text model
- A CLIP Vision model
- A VAE model
- A conditional U-NET model
- A CLIP Vision featurizer
- A CLIP Text tokenizer
- A diffusion scheduler
Now, you can fire up Livebook or a code editor and install the following dependencies:
Mix.install([
 {:bumblebee, "~> 0.1.0"},
 {:nx, "~> 0.4.0"},
 {:exla, "~> 0.4.0"},
 {:kino, "~> 0.8.0"}
])
Before loading any models, you'll want to set EXLA as your default backend. Note that Stable Diffusion is an involved model. If you'd like to run on GPU you likely need a GPU with at least 10GB of memory. If you run on CPU, you'll need to be patient as it may take very long to generate prompts:
Nx.default_backend(EXLA.Backend)
Next, you can use Bumblebee's loading primitives to load the models and featurizers you need:
{:ok, tokenizer} = Bumblebee.load_tokenizer({:hf, "openai/clip-vit-large-patch14"})

{:ok, clip} =
 Bumblebee.load_model(
 {:hf, "CompVis/stable-diffusion-v1-4", subdir: "text_encoder"}
 )

{:ok, vae} =
 Bumblebee.load_model(
 {:hf, "CompVis/stable-diffusion-v1-4", subdir: "vae"},
 architecture: :decoder,
 params_filename: "diffusion_pytorch_model.bin"
 )

{:ok, unet} =
 Bumblebee.load_model(
 {:hf, "CompVis/stable-diffusion-v1-4", subdir: "unet"},
 params_filename: "diffusion_pytorch_model.bin"
 )

{:ok, scheduler} =
 Bumblebee.load_scheduler(
 {:hf, "CompVis/stable-diffusion-v1-4", subdir: "scheduler"}
 )

{:ok, featurizer} =
 Bumblebee.load_featurizer(
 {:hf, "CompVis/stable-diffusion-v1-4", subdir: "feature_extractor"}
 )

{:ok, safety_checker} =
 Bumblebee.load_model(
 {:hf, "CompVis/stable-diffusion-v1-4", subdir: "safety_checker"}
 )
For each model, scheduler, featurizer, or tokenizer, you just need to make use of the correct Bumblebee API. Typically, you need to specify a repo and path for each model you want to load. The tuple {:hf, "CompVis/stable-diffusion-v1-4"} tells Bumblebee to look for the repository "CompVis/stable-diffusion-v1-4" in the HuggingFace hub (as indicated by :hf). The stable diffusion repository is actually a collection of several models, so for each separate model you need to specify a subdirectory to check out.
Generating Images
With your model loaded, you can start to generate images using Bumblebee's diffusion API. At the time of this writing, Bumblebee only implements stable diffusion as an API; however, it's entirely feasible for Bumblebee to support other forms of diffusion.
The stable diffusion API is exposed through the Bumblebee.Diffusion.StableDiffusion.text_to_image/6 function. The function takes as input all of the models loaded in the previous section, a prompt to generate from, and options to control the generation:
stable_diffusion_serving =
 Bumblebee.Diffusion.StableDiffusion.text_to_image(clip, unet, vae, tokenizer, scheduler,
 num_steps: 20,
 num_images_per_prompt: 2,
 safety_checker: safety_checker,
 safety_checker_featurizer: featurizer,
 defn_options: [compiler: EXLA]
 )
The diffusion function actually returns an %Nx.Serving struct, which is a high-level API intended for use in deployment pipelines. The serving takes care of things like pre and post-processing for you, so you can work directly with high-level inputs and outputs.
This serving takes as input a string prompt or a map with keys :prompt and :negative_prompt. Negative prompts are prompts you want the diffusion process to ignore or steer away from. You can run your diffusion model with:
output = Nx.Serving.run(stable_diffusion_serving, %{
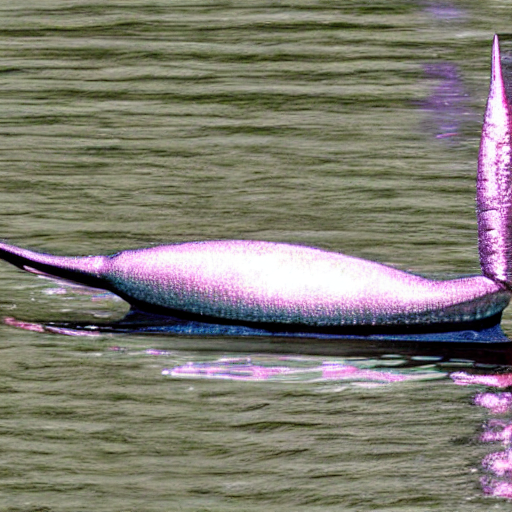
prompt: "narwhal, on a dock, computer, friendly, digital art",
negative_prompt: "dark, foggy"
})
Stable diffusion prompts are different from DALL-E prompts in that it's better to provide the prompt more as a list of attributes rather than coherent text. Feel free to change this prompt to something more open ended.
In addition to the models, prompt, and negative prompt, there are a few options that control the generated output. Most notable is the num_steps parameter, which controls the number of diffusion steps used during the process. More steps will lead to higher quality images; however, the generation process will be significantly slower.
The stable diffusion pipeline is somewhat slow even with a small number of steps, so you should be mindful to trade off compute for generated quality.
outputs will take the form of a map of tensors which represent images. In order to save it to visualize the actual image, you can use Kino.Image:
for result <- output.results do
 Kino.Image.new(result.image)
end
|> Kino.Layout.grid(columns: 2)
This will convert each image to a PNG and render them to the screen. You can save them from there.
You should note that the generation process will take a bit of time, but eventually you should see output PNGs. Because the diffusion process is sensitive to randomness, your results may vary. For example, for this prompt, the pipeline generated the following images:

Moving Forward
While this is a relatively simple example, it should open your eyes to the possibilities with Bumblebee.
For example, there are numerous variants of stable diffusion specialized on very specific use cases. Most, if not all, of these can be used directly from Elixir with Bumblebee. Combined with some of Elixir, Nx, and Axon's high-level deployment capabilities, you can have a production application backed by stable diffusion in just a few minutes.
Additionally, despite the length of this post, you can actually implement this same exact pipeline using Kino's built-in stable diffusion smart cell, without needing to write any code.
Before concluding, I need to give a shoutout and thank you to Jonatan Klosko, who architected much of Bumblebee's APIs, conversion functionality, and more. Without Jonatan, there would be no stable diffusion in Elixir (or Livebook!).
Until next time :)
